WinRest™ Online User Manual
Find Answers to all your questions about service options, pricing and other processes. Or visit the ABS YouTube channel for all the latest updates, videos and much more. And you can always chat live with an ABS Expert Advisor or call 905-278-7975 or 209-233-8846 today.
Top Solutions
| Activity Reports | Filtering Reports |
| Exporting Reports | Restaurant Z |
| Employee Split Shift | Sales Reports |
| Employee X | Z History |
Browse by Category
Activity Reports
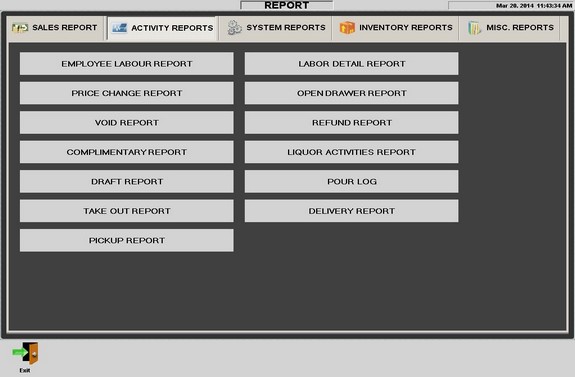
Explore the Activity Reports to find the data required. Each of the Activity Report will provide data specific to its title. Generate, export and even print your reports for easy access.
Return to Top
Configure X,Z Reports
WinRest™ has the ability to customize what sales data you want to appear on the Restaurant X or Z easily, allowing you to get the information you need, and to save paper. Each and every location is unique, so go through each report to determine whether it should be included.
To configure what reports are included on the go to the Permissions utility found in the Options Screen and in cusomize the 'Local EOD Report List' on the EOD tab of Global Settings.
Customizing the Restaurant and Employee X Report
1. Access the Permissions utility from the Options Screen.
2. Customize the report list with the Config X,Z button for each employee type.
3. Save your changes and test the reports.
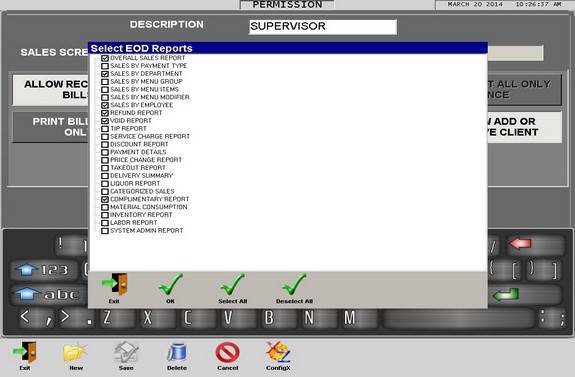
Customizing EOD Reports
1. Access the System Settings available from the Options Screen.
2. Access the EOD tab from the Global Settings uitility.
3. Select the reports to appear on the EOD with the 'Local EOD Reports List'.
4. Save your changes and return to the Home, Sales or Table Screen.
Return to Top
Employee X
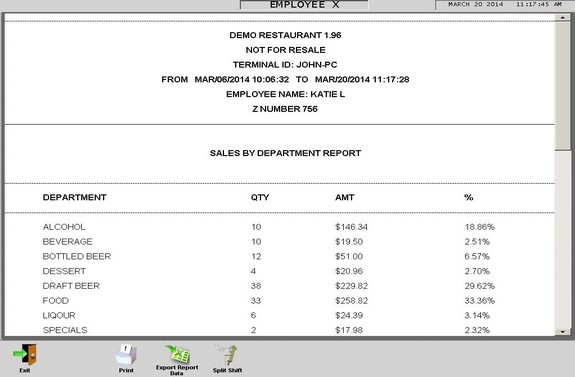
The Employee X is used to generate and display a sales report for that particular employee. When the Employee X is pressed while still have open transactions, a prompt will appear indicating that the sales information will not be balanced due to the open tabs. To proceed, press 'OK'.
Each employee type will have to customize what sales data is set to appear on the Employee X Report. To customize the report list, sign in as a supervisor, access the Permissions Utility from the Options Screen, and use Config XZ to select what reports are to be included. Remember to save any changes in order for the changes to be taken into effect.
Employee Split Shift

For employees that have multiple shifts throughout
the day, and do not require to sign out, they
can use the Split Shift utility. When Split
Shift is pressed
from the Employee X utility, and yes is
selected, all sales for that employee will be
capured in an Employee X report, and their sales
will be reset to zero. Any and all X reads will
be available from the Repeat X button.
X History

To view and/or print the
previous Employee X report, sign back into
WinRest, press the Employee X button and then
the
Return to Top
Exporting Reports

To Export a Report from Within WinRest™
1. Select the
report that you would like to export.
2. Select the start date and time
and end date and time.
3. Press the 'Export
Report Data' button.
4. Select the fields,
file type and location to export and save to.
Return to Top
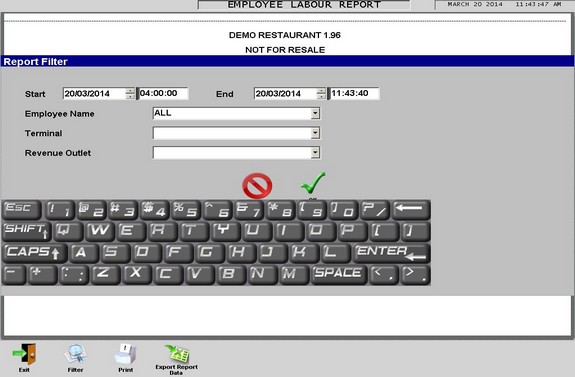
The Filter
button provides that ability to select a start and end
date and time to narrow search results easily. Most reports will provide
access to the Filter utility, so feel free to
use the filters available whenever possible to
gather sales data quickly and efficiently.
Using the Fliter Button on Reports
1. Access the desired report
2. Press the
'Filter' button.
3. Enter the start date and
time, then the end date and time.
4. Select
any other applicable filters such as employee,
payment type, etc.
5. Press 'Ok'.
Return to Top
To Generate a Report From Within
WinRest™
1. Sign in as a supervisor
and access the Reports button.
2. Select the
report that you would like to generate.
3.
Depending on the report generated, you may have
to apply to the Filter utility.
4. Press the
Filter button from the bottom row of buttons.
5. Select the start date and time .
6. Select
the end date and time.
7. Press Ok.
To Print a Report from Within WinRest™
1.
Ensure the desired printer is configured to
print reports.
2. Select the
report that you would like to generate.
3. Select the start date and time
and end date and time.
4. Press the 'Print'
button
Print a physical copy of your EOD
and any other relevant report deemed for safe
keeping.
** IMPORTANT **
The receipt printer must be
configured in the system settings to print
reports and related print jobs.
Return to Top

Explore the
Miscellaneous Reports to find the data required.
Each of the Report will provide data specific to
its title. Generate, export and even print your
reports for easy access.
Return to Top

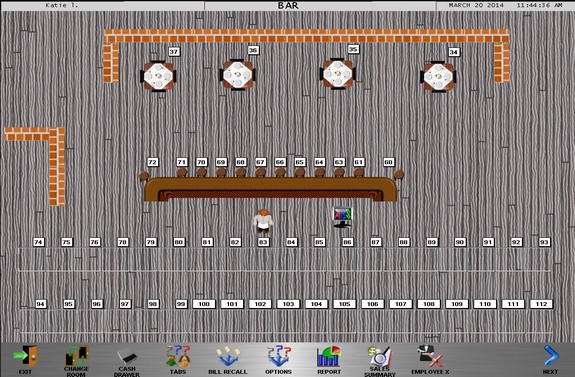
The X
Report button can be accessed from both the
Table and Sales Screen to generate a
snap-shot of any and all sales that have taken
place since the last Z Report. If there are any open
transactions, a prompt will appear indicating
that the X Report will not balance, if
you would like to continue. Press yes to proceed,
if not, press no. To access any open
transactions, press the Tabs button.
If
the report is blank, ensure that reports are
enabled under the Config X utility available
from the
Permissions utility. Each employee type
should be customized using the Config X utility.
Return to Top
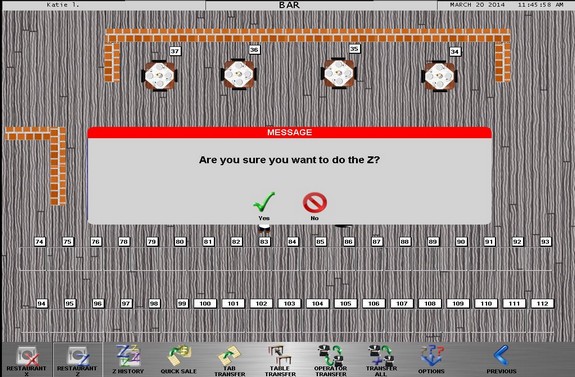
At the end of the sales
period or shift, and
it is time for the final reading, just run the Z
Report utility from either the Sales or Table
Screen. By default, all open
transacions will have to be closed before any
Restaurant Z can be performed. To
perform the End of Day while there are open
transactions, access the Options tab found in
the Global Settings utility and enable 'Allow Z
with open transactions'.
Lastly,
customize what information appears on the EOD
(End of Day, or Restaurant Z) by configuring the
Local EOD Reports in the EOD tab available in
the Global Settings utility.
Customizing EOD Reports
1. Access
the System Settings available from the Options
Screen.
2. Access the EOD tab from the Global
Settings uitility.
3. Select the reports to
appear on the EOD with the 'Local EOD Reports
List'.
4. Save your changes and return to the
Home, Sales or Table Screen.
Once the
Restaurant Z has been generated, it is stored in
the Z History utility as a numbered, date and
time-stamped Z Report. Review the
Z History utility
section of the User Manual to learn more.
Cash Reconcile Utility
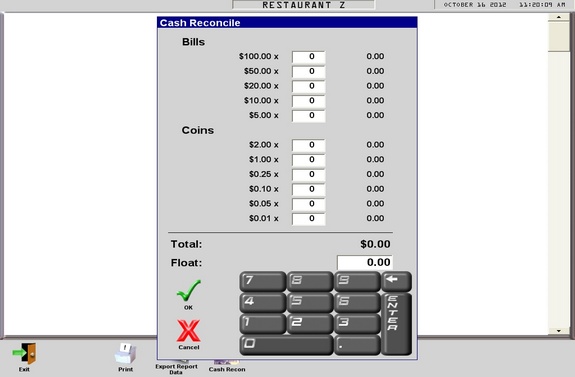
Account for every dime with a built-in cash
reconcile tool that allows staff to enter in to
the database, exactly what has been taken in.
Using the Cash Reconcile Utility
1. Access the Default Values tab in the Global
Settings Utilities.
2. Select Z from the drop
down menu for 'Show Cash Recon On'.
3. When the Z Report is accessed, the Cash
Reconcile Utility will appear.
4. Enter
the amounts into the appropriate fields.
5.
Press "ok".
The Z Report and Z History
buttons can be accessed from both the Sales and
Table Screens. To access any previously
generated z report, use the Z History button.
The Z Report utility can generate a Z Report as
many times throughout the day as you wish.
Generally, the report is ran at the end of the
sales period.
If there are any open transactions a prompt will appear indicating that the Z Report can not continue, unless configured to do so under the Advance Options tab in the Global Setting utility. Furthermore, If no sales have taken place, a prompt will appear stating the Z Report can not be performed.
Remember to check the Tabs utility for any
transactions that have yet to be settled. Visit
the Z History section of
the usermanual to get learn more.
Sales Summary & Bill recall
Return to Top
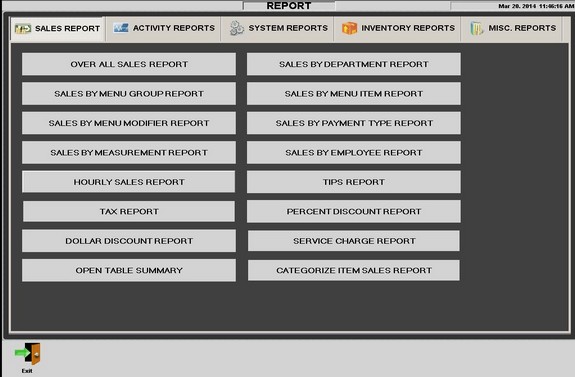
Explore
the Sales Reports to find the data required.
Each of the Sales Reports will provide data
specific to its title. Generate, export and even
print your reports for easy access.
Return to Top
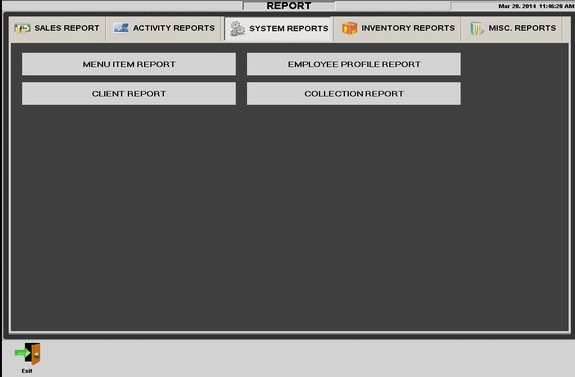
Explore
the Systems Reports to find the data required.
Each of the System Reports will provide data
specific to its title. Generate, export and even
print your reports for easy access.
Return to Top
From
the Sales Summary Utility you have the ability
to view any and all transactions that have taken
place during any period of time.
To Access Sales From a Previous Date and Time
1. Access the "Sales Summary Utility" from the
Table or Sales Screen.
2. Press "filter"
along the bottom row of buttons.
3. Select
the start date and time.
4. Select the end
day and time.
5. Select the employee,
terminal or revenue outlet. (Optional)
6.
Press "ok"
Bill Recall
Use the Sales Summary utility to find any
bill that has taken place since the last
restaurant z. When a bill number is found using
the Sales Summary, then that bill number can be
entered in to the Bill Recall prompt. When
recalling a bill, any payment attached to the
bill will be removed, and you will have to
select an open table to then access the
bill/tab.
Please note, once a bill has
been recalled, the bill will have to be settled
with a payment type, such as cash, visa, amex
and so on.
Return to Top
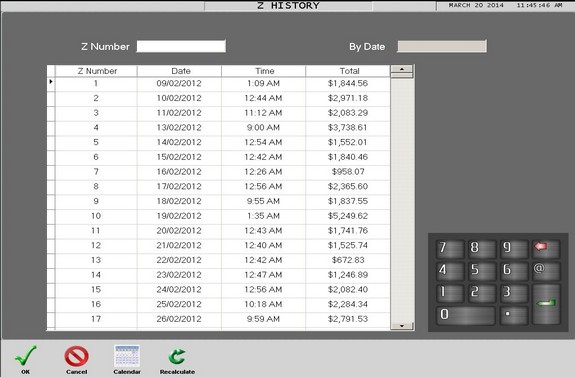
The Z History Utility is similar to the
Sales Summary tool as it is where all sales data
is stored in the form of numbered, date and
time-stamped Z Reports. Z Reports are generated
whenever a Restaurant Z is performed and
includes Sales data for a number of
categories, such as food, beverages, alcohol,
misc, etc, when enabled from the Local EOD
Reports available in the EOD Tab found in the
Global Settings utility. Furthermore, the Z
History utility makes it easy to find, review
and/or print past
Restaurant Z Reports for analysis.
Using the Z History Utility
1. Sign into WinRest™ as a supervisor
2. Access the Z History Utility from the Table
or Sales Screen.
3. Select the Z Report that
you would like to view.
4. Press 'ok'.
Feel free to review the
Restaurant Z section
of the user manual to learn more about closing a
sales period and the Restaurant Z or EOD (End of
Day) Report.
Return to Top
Need more help?
Help from your Authorized WinRest™ Reseller
If you require more help with installing,
upgrading, or activating your copy of WinRest™,
please contact your Authorized Reseller today.
Help from a WinRest™ Expert Advisor
If you do not have an Authorized
Reseller, contact us today to
find out how to get started.
System Requirements
Supported operating systems
Windows POS Ready
2009
Windows XP SP2
and above
Windows 7 SP1 (x86
and x64)
Windows 8.1 (x86
and x64)
Windows 10 (x86
and x64)
Supported architectures
32-bit (x86)
64-bit (x64)
Hardware requirements
1 GHz or faster processor
1 GB of RAM (1.5 Ghz if running on a virtual machine)
1 GB of available hard disk space
600 MB of available hard disk space (language pack)
5400 RPM hard drive
DirectX 9-capable video card running at 1024 x 768 or higher display resolution.
Magnetic Card Reader
(Optional)
Barcode Scanner
(Optional)
Scale
(Optional)
Pin
Pad for accepting payments with WinAuthorize™
(Optional)
Software requirements
Microsoft .NET Frameworks
3.5
Firebird SQL 2.5

Return to
Top